Nikon Timelapse movie mode
Whether you are new or old to Nikon camera systems you may well have never seen this feature that is packed into all Nikon DSLR/Mirrorless cameras since the D810. Even Nikon Ambassadors I have spoken to in the past had no idea this existed and for busy landscape photographers that want to add some time lapses to instagram stories or the likes this is an easy quick way to produce stunning 4K time lapse videos straight out of your camera without having to spend the countless hours processing hundreds or thousands of individual images and filling up memory cards.
In this blog post I am going to show you how to can achieve a day to night or night to day time lapse with the Milky way either rising or setting similar to this one I captured this morning.
How to set your camera up
First of all if you are shooting night to day you will want to set you ISO to the ISO you would shoot your Milkyway in, for this time lapse I choose to use 5000 ISO to make sure my exposures didn’t go too long, Then set your white balance manually for me I shoot my Milkyway at 3400k, If I was shooting only a night time lapse I would set my aperture to the lowest on my lens and leave it in Manual but seeing as this will transition into daylight I need to choose aperture priority. And last of all set your focus on a star and make sure that is in manual focus.
Next up if you have your 2 second timer on, turn that off as it won’t let you start a timelapse while this is on.
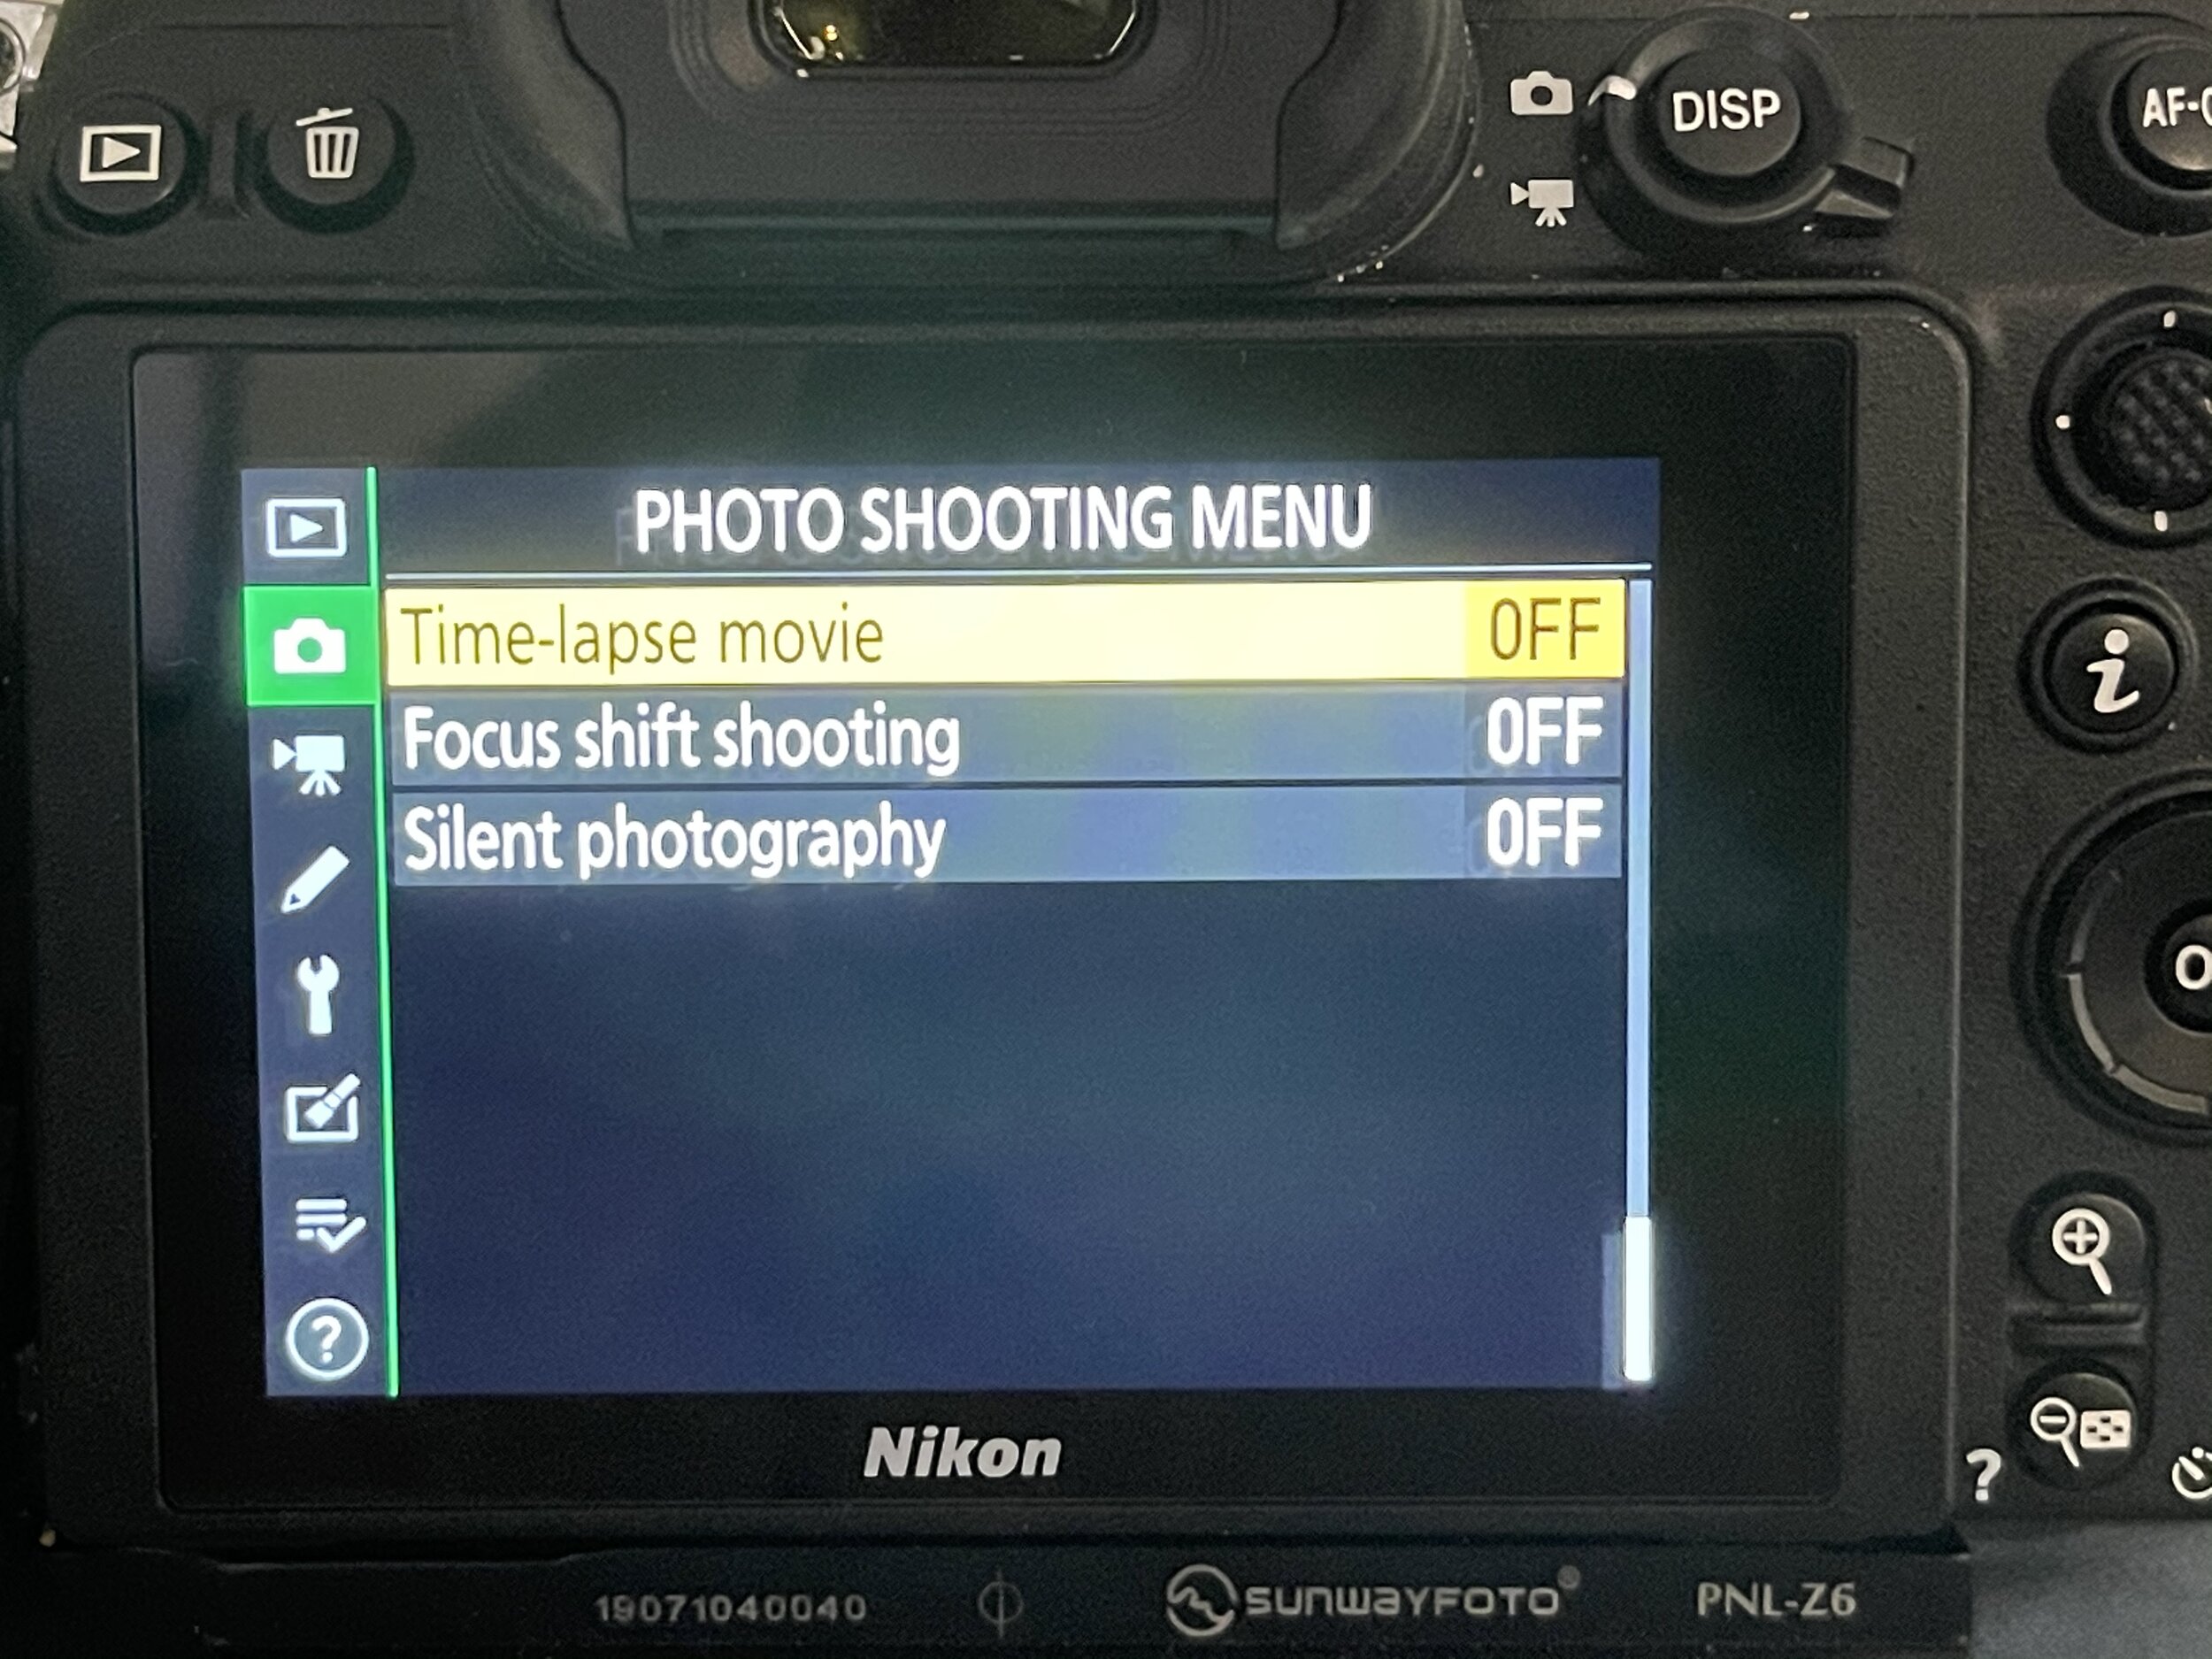
Next you need to head to the timelapse menu which you can find in the photo shooting menu near the bottom and it is titled “Time-Lapse Movie”
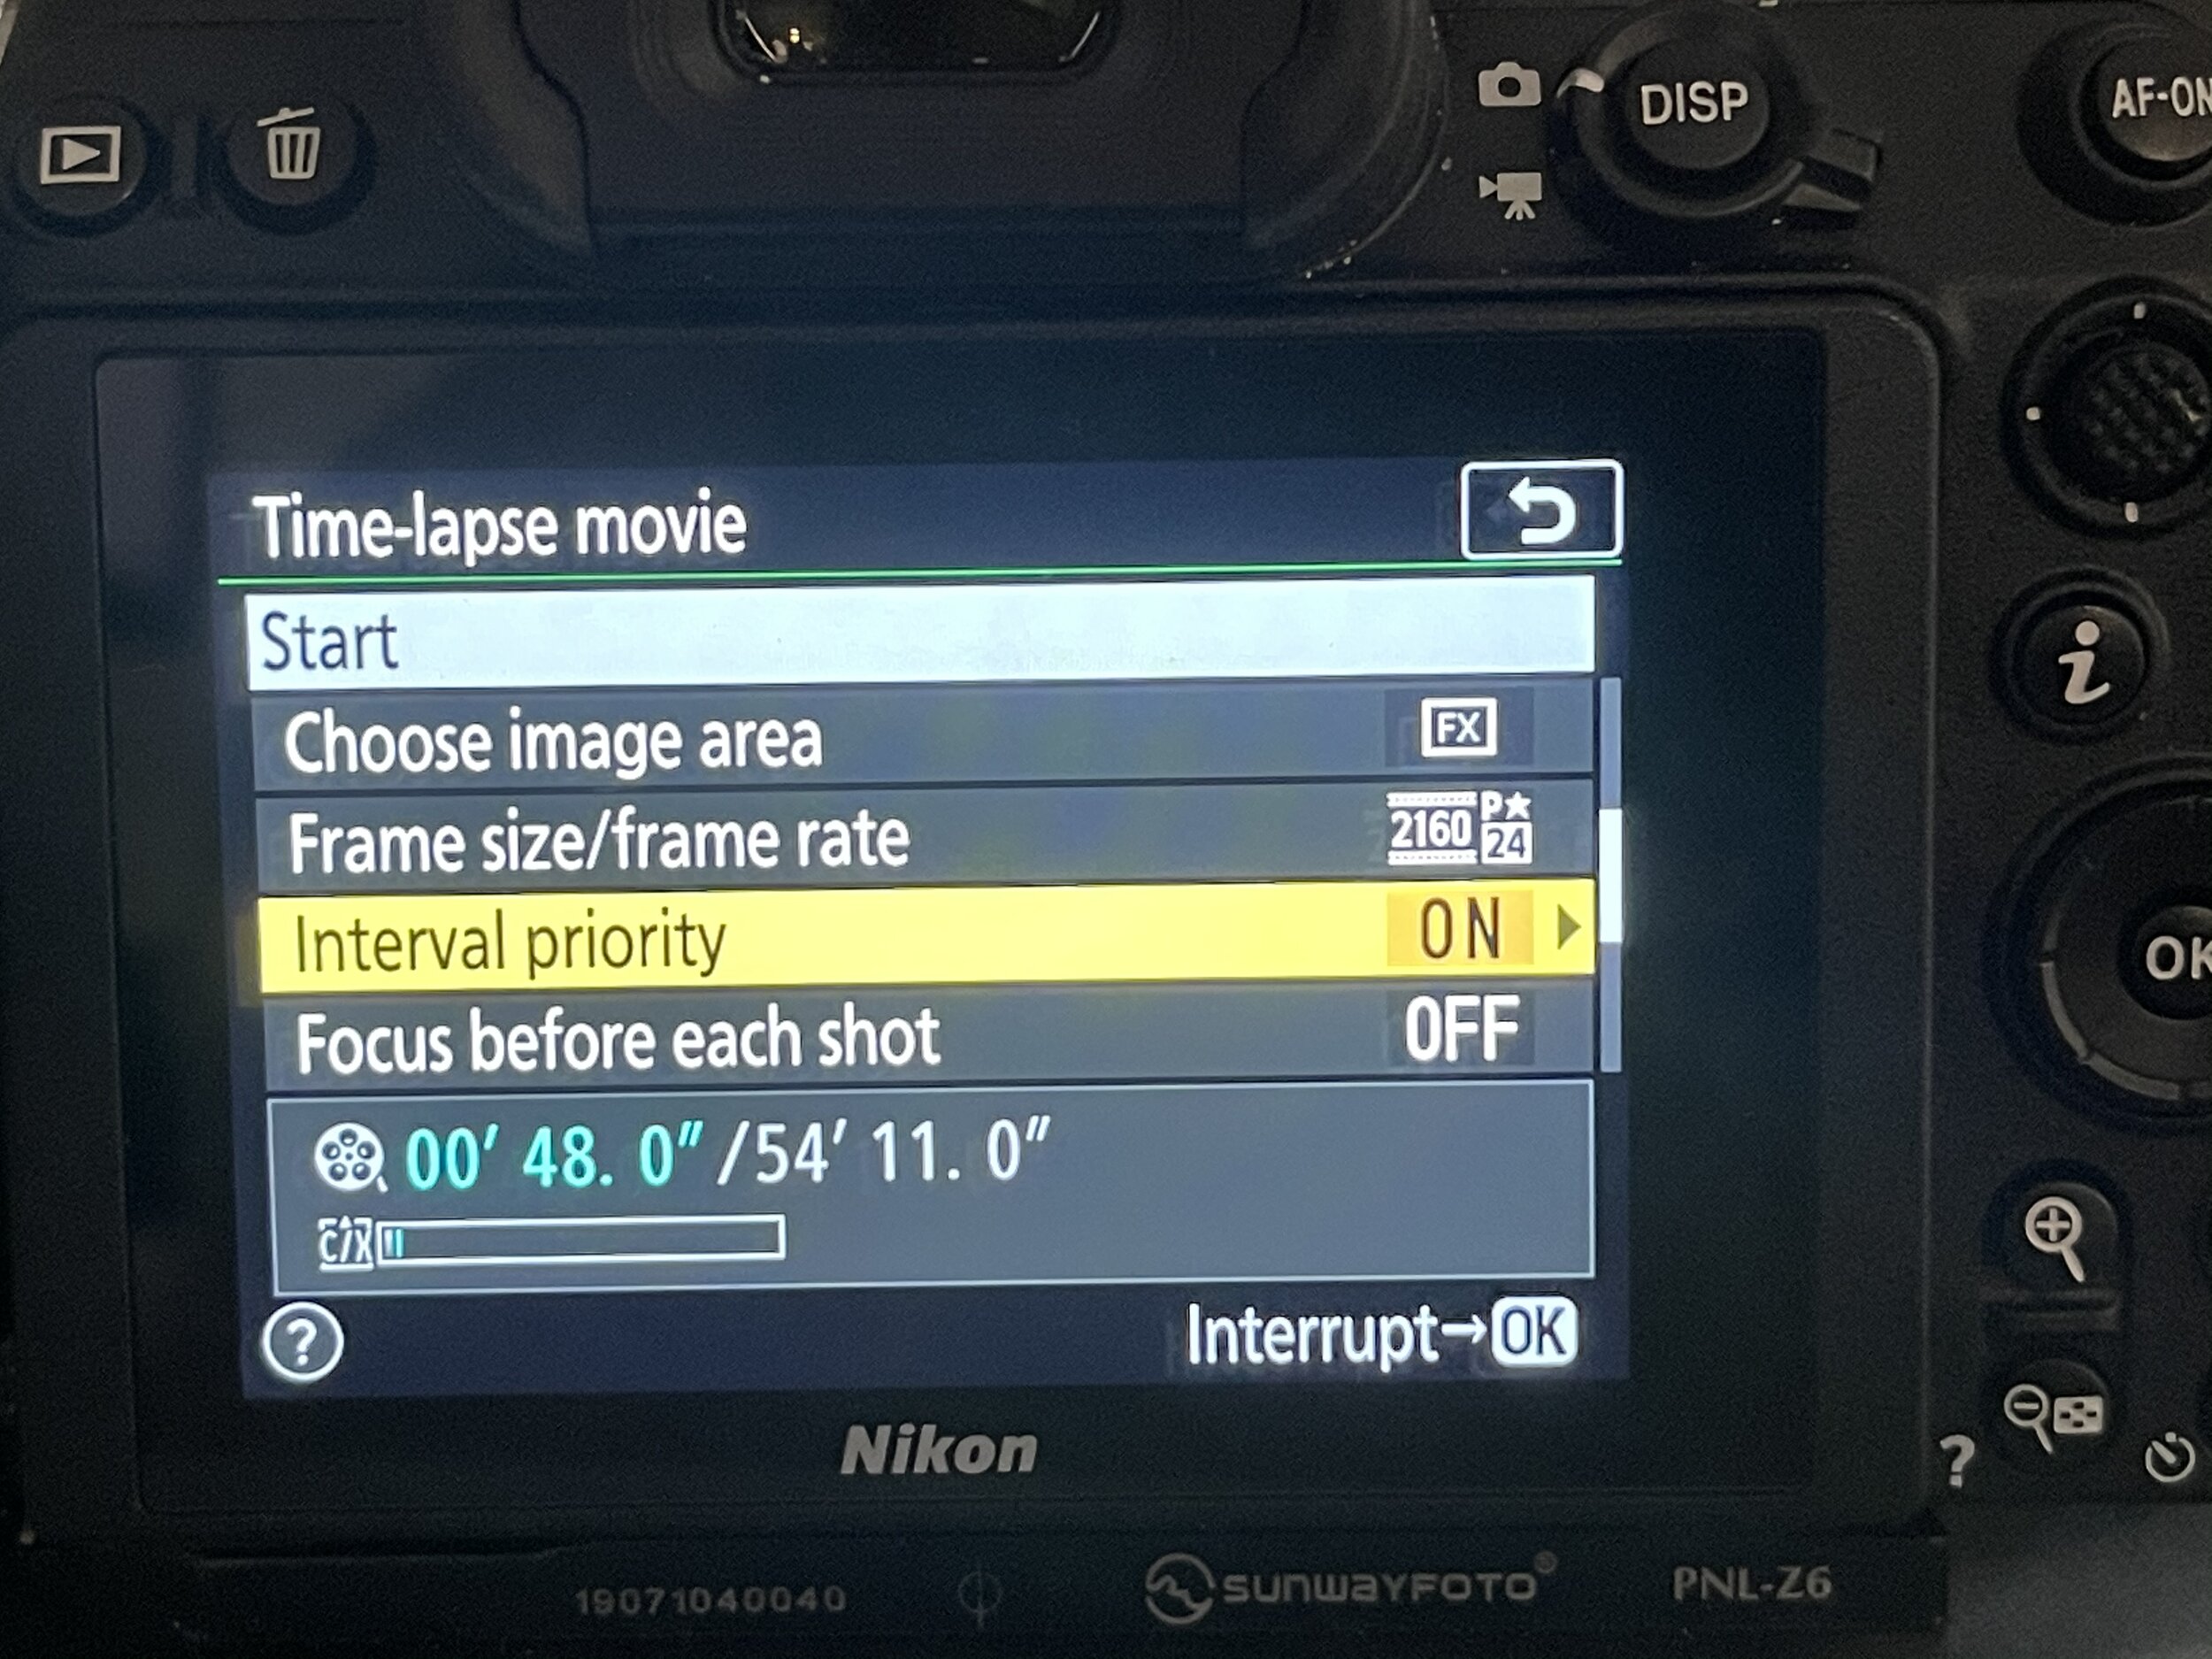
Once you are in there you have a series of changes you can make, the first one is the interval which I set at 30” as I know my exposure time with my settings mentioned above wont get to 30” (you want to allow some time for the camera to get ready for the next shot)
next up is the shooting time, I choose to set mine beyond a time I know I will be shooting if you know exactly how long you want to shoot for you can set that or if you choose a longer time you can simply turn your camera off and on again and it will end the timelapse.
Next is exposure smoothing, turn that on to reduce the flicker in your timelapse.
Next is silent photography I choose to have that on but it is totally a preference for each and every person.
then you can choose if you want it to be the full frame or cropped in I leave mine Full frame(FX) and if I want to crop I can do that in post.
For Frame size/Frame rate I choose 2160 - 24p which is 4k at a24 frames per second, you want to choose the highest quality possible which not only gives you the best image quality but also provides you the option to crop in with key frames to make it look like you are either on a slider and moving sideways or it can look like you are zooming in.
the next is interval priority which I actually forgot to turn on for this timelapse which is why you see the Milkyway slow down when it gets lighter, what that is doing when it is not on is rather than the interval being taken from the start of the exposure it is taking it from the end. if you have this on it will stay a constant through out.
And lastly make sure you turned the “focus after each shot” off as in the night the camera will be searching for focus and wont take a photo.

During the shooting of the timelapse you will have to make some changes to your white balance and ISO when it becomes lighter, At the start of Blue hour you will want to start ramping your white balance up by small increments so that by the time the sun is starting to come up your white balance is around 5300, to do this you need to act quick between intervals, Once you see the camera has taken an image hit either the ISO or =/- button, this will unlock your settings and allow you to change your white balance and ISO between shoots, make sure you do this in small increments so that you don’t get any drastic jumps in White balance or exposure.
The best part about this feature is how easy and quick it is for anyone to create high quality timelapse without having to spend hours and hours editing, I highly recommend getting out there and having a play with it and create some new and exciting content.